NYC

NYC

Saturday, December 20, 2014

Roasted Kale with Garlic and Sun Dried Tomatoes

It's been TOO LONG since my last post! I have been so busy with work and baking for a Holiday Market in my neighborhood.  But in between all my baking (and snacking on my goodies), I realized I needed to make something nutritious, satisfying and sugar free!  Here is a delicious recipe that makes use of a whole bunch of kale.  You can use it as a side, add it to salad or toss it with pasta.  
Enjoy!

Roasted Kale with Garlic and Sun Dried Tomatoes

Ingredients:

  • 1 bunch of kale
  • 2 tablespoons lemon juice
  • 1 teaspoon salt (or to taste)
  • 1 tablespoon +1 teaspoon extra virgin olive oil
  • 1/4 cup sun dried tomatoes, sliced into strips
  • 2 cloves garlic, minced
  1. Preheat oven to 400 degrees.  Line a sheet tray with parchment paper.  
  2. Wash a dry kale.  Remove the leaves from the stems like this: 
  3. Tear up the kale into smaller pieces, keeping in mind they will shrink more when you roast them.  This is more of a preference, so do what you like!
  4. Put the kale into a large bowl, and add the lemon juice and salt.
  5. Massage the kale with your hands for a few minutes (hopefully you don't have any cuts on your hands!)  At this point add 1 tablespoon of olive oil and massage a bit more.  You will notice that the color of the kale will begin to intensify.  This is a good thing :) 
    This is the color of the kale before it was massaged
    This is the kale after it was massaged.  Look at the intense green color!
  6. Taste the kale for salt.  If you want more salt add some! 
  7. Spread the kale out on the sheet tray and drizzle with 1 teaspoon olive oil.
  8. Roast in the oven for 10 minutes.  Remove from the oven and add the sun dried tomatoes and garlic.  Roast for another 5 minutes.  Enjoy!! 


Saturday, November 22, 2014

Autumn Banana Pumpkin Muffins (vegan)

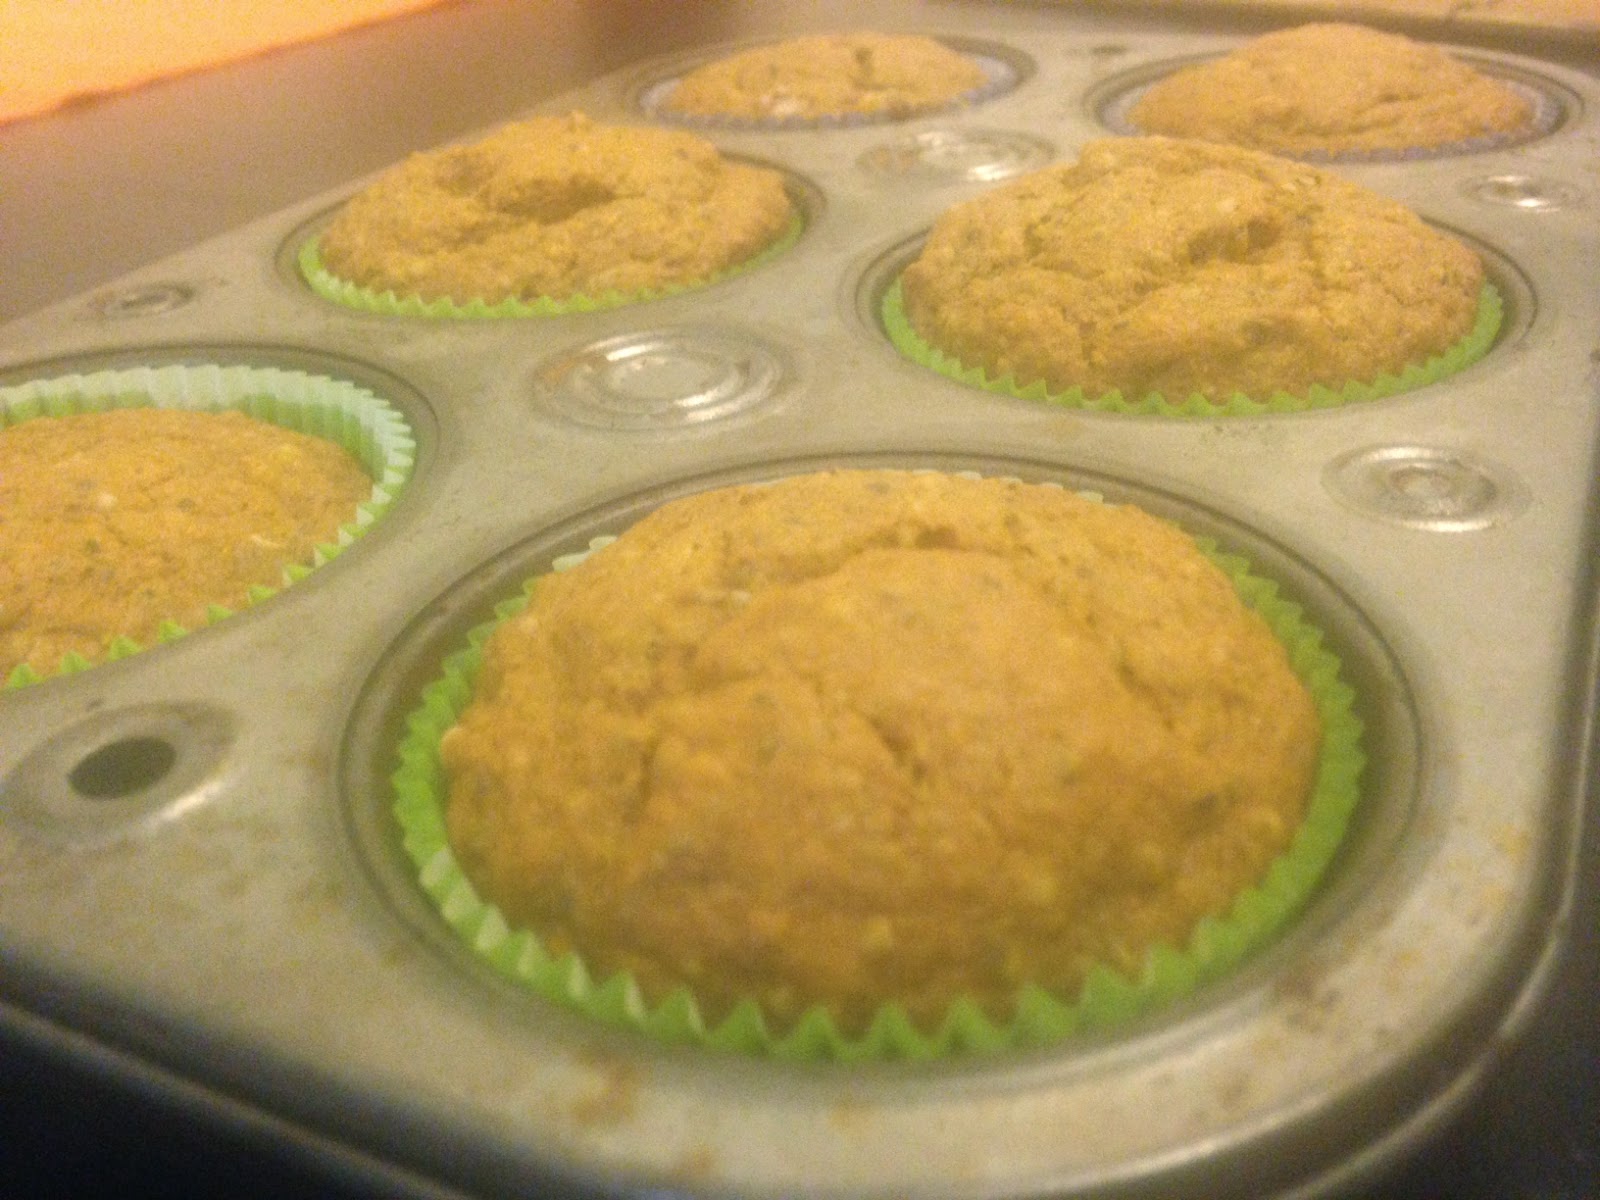
I woke up really early this morning and couldn't fall back asleep.  So I decided to bake something for breakfast.  I had two ripe bananas, and some leftover pumpkin puree from my recent cooking class.  I decided to take my go-to vegan banana muffin recipe, and spice it up with some flavors of autumn! 
I actually made one small loaf as well as 6 muffins.  I will be drizzling dark chocolate on the loaf to bring to a family party on Sunday!


These muffins have a slightly crusty top and are fluffy and moist on the inside. 
Happy Baking!


Autumn Banana Pumpkin Muffins (vegan)

Ingredients:

  • 1 tablespoon golden flaxseed meal + 3 tablespoons warm water**
  • 1/4 cup apple cider heated
  • 1/3 cup dried cranberries
  • 1 1/2 cups whole wheat pastry flour
  • 1 teaspoon baking powder
  • 1 teaspoon baking soda
  • 1/2 teaspoon sea salt
  • 3/4 teaspoon ground cinnamon
  • 3/4 teaspoon pumpkin pie spice
  • pinch of freshly grated nutmeg 
  • 2 large (or 3 small-medium) ripe bananas, mashed
  • 1/2 cup pumpkin puree
  • 1/4 cup brown sugar
  • 3 tablespoons organic sugar
  • 1 teaspoon vanilla extract
  • 1/3 cup coconut oil, melted
  • 2 tablespoons hemp hearts
  • 2 tablespoons chia seeds
  • 1/4 cup pumpkin seeds
  1. Preheat oven to 350 degrees F.  Line muffin tin, or if baking a loaf, coat with oil and breadcrumbs.
  2. Prepare your flax egg by combining flaxseed meal with warm water, whisking gently and setting aside.
  3. Heat the apple cider on the stove or in the microwave until it begins to boil. Add the dried cranberries and set aside.
  4. In a medium bowl, whisk together flour, baking powder, baking soda, salt, cinnamon, pumpkin pie spice and nutmeg. Set aside.
  5. In a large bowl, mash the bananas with a fork or whisk.  Combine bananas with pumpkin puree, sugars, vanilla, melted coconut oil and flax egg mixture.
  6. Fold the flour mixture into the banana mixture, and mix until smooth. 
  7. Fold in hemp seeds, chia seeds, cranberries (without the liquid) and pumpkin seeds.
  8. Bake for 20 to 25 minutes, or until a toothpick inserted in the center comes out clean. Allow to cool slightly before removing from the pan.
Enjoy with your favorite cup of tea like I did :)


** In baking where the egg is used for binding, you can replace an egg with a flax "egg".  You do this by combining 1 tablespoon of golden flaxseed meal (I prefer golden because it doesn't affect the color of my finished product) with 3 tablespoons of warm water.  Whisk it to combine and set aside until it become gelatinous- about 3 minutes.

Wednesday, November 5, 2014

Sweet and Spicy Glazed Brussel Sprouts


Brussel Sprouts on the stalk are so beautiful, however I have never been a fan of them.  I decided that I would attempt to change my mind…and I did!

This recipe is super simple, and absolutely delicious.

Sweet and Spicy Glazed Brussel Sprouts


  • 12 brussel sprouts
  • 1 tablespoon olive oil
  • 1 teaspoon salt
  • 2 tablespoons soy sauce
  • 1 tablespoon rice vinegar
  • 1 tablespoon agave syrup
  • ½ teaspoon crushed red pepper flakes
  • 1 teaspoon canola oil
  • 1 clove garlic, finely minced
  • 1 teaspoon kuzu (crushed into powder) + 1 tablespoon water (you can use cornstarch too)
  1. Preheat oven to 375 degrees.
  2. Cut brussel sprouts off the stalk, and pull off any yellow outer leaves.  Wash and dry them (if you have loose brussel sprouts just wash and dry them.
  3. In a large bowl toss the brussel sprouts with 1 tablespoon olive oil and 1/2 teaspoon salt.
  4. Place on a parchment lined sheet tray and roast for 35-40 minutes until crisp on the outside and tender on the inside. Shake the pan from time to time to brown the sprouts evenly. 
  5. In a small bowl, mix together the soy sauce, rice vinegar, agave syrup, and red pepper flakes.
  6. When the brussel sprouts are done, remove from the oven.
  7. Heat canola oil in a small saucepan over medium-low heat. Once heated, add the garlic. Let it cook for one minute, stirring to avoid garlic from burning.
  8. Add in the soy sauce mixture and raise the heat to medium. 
  9. Make a slurry with the kuzu and water, by whisking them together.  Add to soy sauce mixture and stir until sauce thickens.  Once you reach the desired glaze consistency, add in the brussel sprouts and toss well.

    10.  Serve Immediately and enjoy!

    -Deniz
    The Chef in the CIty

Monday, October 27, 2014

Pumpkin Spice Granola

There’s nothing better than the colors and smells of the harvest. During the fall, I feel more inclined to spend time in my kitchen, cooking, and eating comforting, nutritious food. Maybe I am biased, but fall is my favorite season all around. I love the sunny days and the crisp fresh air, the colors of the leaves changing, the anticipation of the holidays, and the shift from fresh raw foods that I enjoy eating during the summer, to the warm, comforting foods of the autumn harvest.  In honor of autumn, I decided to make Pumpkin Spice Granola.  I love eating it on its own as a snack before I train capoeira, for breakfast or if i need a little pick me up in the afternoon. Honestly, its pretty addictive…..so don't say I didn't warn you!The pumpkin seeds, along with cinnamon and nutmeg are what give the granola its name.

Pumpkin Spice Granola ( vegan & gluten free )


  • 3 tablespoons olive oil
  • 2 tablespoons brown sugar
  • 2 tablespoons maple syrup
  • 3/4 teaspoon sea salt
  • 1 teaspoon ground cinnamon
  • 1/2 teaspoon freshly ground nutmeg
  • 1 teaspoon vanilla extract
  • 2 cups gluten free rolled oats
  • 1/2 cup raw pumpkin seeds
  • 1/2 cup unsweetened coconut flakes
  • 1/4 cup chopped pecans
  • 1/4 cup dried cranberries
  • 1/4 cup raisins
  1. Preheat oven to 350 degrees.
  2. In a small saucepan, heat the olive oil, brown sugar, maple syrup, sea salt, cinnamon, nutmeg and vanilla extract, whisking until the brown sugar is dissolved.  Remove from heat.
  3. Mix the oats, pumpkin seeds, coconut flakes and pecans in a large bowl.
  4. Pour the liquid mixture into oat mixture and mix with a spatula until fully incorporated.
  5. Spread granola mixture onto a parchment or silpat lined sheet tray so that it is about an inch thick.  Make sure that the edges are not thinner or else they will burn.
  6. Bake in the oven for about 15-20 minutes, or until the granola is golden.
  7. Remove granola from the oven and let cool.  Break into pieced and toss with cranberries and raisins.
  8. Store in an airtight container.
Let me know how you liked this recipe!
-Deniz
The Chef in the City


Thursday, October 23, 2014

Autumn Cornmeal Pancakes ( dairy free & gluten free )


About a month ago, I was transferring my bag of cornmeal into mason jars. There was 2/3 cup that wouldn't fit in the jar and I was not going to let it go to waste, or use another mason jar for such a small amount of cornmeal.  So naturally, I decided I would make something with the cornmeal.  I forced myself to record my measurements (I am so bad at keeping track of my culinary experiments!) so that I could share the recipe.

I love the texture of these pancakes.  They get crispy on the outside, and kind of cakey on the inside.  They are really filling and satisfying.  When I made them a month ago, I made a maple apricot sauce, but I didn't feel that it was fitting for the fall.  For these, I used a bit of freshly ground nutmeg and cinnamon and then to make them more substantial, I topped them with a few sliced bananas and maple syrup. You can use this recipe as a base and come up with many variations depending on the season or your mood.  

Autumn Cornmeal Pancakes ( dairy free & gluten free )

Serves 2 slightly hungry people


  • 2/3 cup yellow cornmeal
  • 1/4 cup coconut flour
  • 1/4 teaspoon baking soda
  • 1/4 teaspoon baking powder
  • 1/4 teaspoon sea salt
  • 1/4 teaspoon freshly ground nutmeg
  • 1/2 teaspoon ground cinnamon
  • 2/3 cup almond milk* (or milk of your choice)
  • 1 teaspoon vanilla extract
  • 1 teaspoon agave syrup (or maple syrup)
  • 2 teaspoons coconut oil (in liquid state)**
  • 2 eggs


    * When using coconut oil that needs to be in its melted state for a recipe, if you are combining it with something cold, like milk, it is important to heat up the milk so that the coconut oil does not become solid again.  In this case, I heated up the almond milk slightly, so that it was at room temperature before adding the coconut oil.

    ** During the cooler months, coconut oil will be in its solid state.  If your recipe calls for it to be in its liquid state, you can heat it up in the microwave or on the stove for a few seconds.

    1. In a medium sized bowl, whisk together the cornmeal, coconut flour, baking soda, baking powder, salt, nutmeg and cinnamon.
    2. In a liquid measuring cup, whisk together the almond milk, vanilla extract agave syrup, coconut oil and eggs.
    3. Pour the wet ingredients into the dry ingredients, and mix just until everything is incorporated.
    4. Heat a nonstick skillet to medium-high and use your oil of choice to slightly coat the pan.
    5. Using a 1/4 cup measure, place batter onto a heated skillet and when the edges start to bubble slightly, lower the flame to medium and flip the pancake over.  Cook until both sides are golden.
    Enjoy!  Let me know if you try any variations of this recipe!
    -Deniz
    The Chef in the City

    Monday, October 13, 2014

    Sweet Potato Muffins (gluten free + dairy free!)


    As some of you may know, I teach cooking and baking classes for children as young as 18 months to adults.  I absolutely love my job and am amazed how much I learn every day from my students.  In my baking class for children, we made sweet potato graham muffins, and they were delicious.  I have one student who cannot eat dairy, so I modified the recipe so that he could eat them.  I was inspired by this recipe to take it one step further and to make it gluten free because I know many people who have gluten intolerance.  These muffins are nutty, moist and slightly sweet.  They are a wholesome breakfast that will hold you over, or a great snack.  I hope you enjoy them as much as I do!


    Sweet Potato Muffins (gluten free + dairy free!)

    • 1 1/4 cups gluten free oat flour (I made my own in the dry vitamix but you can buy it pre-made)
    • 1/2 cup gluten free oats
    • 1 cup almond meal (I made my own in the dry vitamix but you can buy it pre-made)
    • 1 teaspoon baking soda
    • 1 teaspoon baking powder
    • 3/4 teaspoon ground cinnamon
    • 1/2 teaspoon sea salt
    • 2 tablespoons light brown sugar
    • 1/4 cup melted coconut oil
    • 6 ounces non-dairy yogurt (you can use coconut yogurt, almond yogurt, soy yogurt)
    • 2 pasture raised eggs
    • 1/4 cup maple syrup
    • 1 cup shredded sweet potato (1 small sweet potato)

    ** I have included photos below the procedure with additional comments**

    1. Preheat oven to 350°F. Line a 12-cup muffin tin with cupcake papers; set aside.
    2. In a large bowl, whisk together oat flour, oats, almond meal, baking powder, baking soda, cinnamon, salt and brown sugar.
    3. In a second large bowl, vigorously whisk together melted coconut oil and yogurt for 30 seconds. Add eggs one at a time, whisking well after each addition, finally whisking in the maple syrup.
    4. Add the wet mixture to the flour mixture and fold together until just combined.
    5. Fold in the shredded sweet potato.
    6. Spoon batter evenly into muffin tins and bake until golden brown and cooked through, about 25 minutes.

    These are all the dry ingredients before and after I whisked them together

    This is the mixture of coconut oil, yogurt, eggs and maple syrup

    Here, I am adding the wet mixture to the dry mixture

    After I have mixed together the wet and dry mixture, I add the shredded sweet potato

    Here is the batter, ready to be scooped into the muffin tins!

    This is the scoop I use, which allows me to make muffins that are uniform in size

    I hope you enjoy these muffins as much as I did!
    - Deniz
    The Chef in the City 


    Wednesday, September 10, 2014

    Homemade Pizza - Cauliflower Crust - Fresh Mozzarella - Heirloom Tomatoes - Basil


    I've been wanting to try making pizza with cauliflower crust for a while now.  This weekend when I was at the Farmer's Market, I  bought yellow cauliflower, beautiful heirloom tomatoes, and fresh mozzarella.  When I got home, I realized that I had the perfect ingredients to finally try the cauliflower crust.
    I'll be honest..this recipe isn't one of my quickest ones.  But it is fairly easy.  I made it on Sunday night when I had some more time to cook than on weeknights.  The only thing that makes this recipe take more time is that after boiling the food processed cauliflower, you have to strain it and let it cool in the freezer before squeezing all the liquid out.  This process takes about 15 minutes.  However, while the cauliflower is cooling in the freezer, I prepped everything for a big salad. so it wasn't a waste of time.  I was very surprised at how filling this pizza was.  I can easily eat 4 slices of regular pizza, and I ate 3 small slices of this pizza and was satisfied!


    Homemade Pizza - Cauliflower Crust - Fresh Mozzarella - Heirloom Tomatoes - Basil

    Serves 2 people

    • Olive oil, for greasing parchment paper
    • 1 medium sized head of cauliflower
    • 1/4 cup almond meal (also called almond flour)
    • 1/4 cup + 3 tablespoons  golden flaxseed meal (ground golden flax seeds)
    • 1/2 teaspoon dried oregano
    • 1/2 teaspoon dried basil
    • 1/2 teaspoon sea salt
    • 1 large egg
    1. Place a pizza pan/stone the oven, or baking sheet if you don't have one. Preheat oven to 450 degrees. Place a large piece of parchment paper on your counter and brush generously with olive oil.  
    2. Wash and throughly dry a small head of cauliflower. Cut off the florets and pulse in your food processor for about 30 seconds, until you get powdery snow like cauliflower. I ended up with 3 cups.

    3. Pour the cauliflower into a large sauce pot, add just enough water to cover, and bring to a boil. 

    4. Cover, reduce the heat and allow to cook for 5 minutes. Drain the liquid, then transfer the cooked cauliflower into a freezer-safe bowl. Place in the freezer to cool for 10 minutes.
    5. Once cauliflower is cool enough to handle, wrap it up in a dish towel or double layer of cheesecloth and wring it out. You want to squeeze out as much water as possible. This will ensure you get a chewy and crispy pizza crust instead of a crumbly mess. 
      This is how I squeezed out the
      liquid from the cauliflower
      I squeezed 1 cup of liquid out of the cauliflower!  
    6. Put the cauliflower into a bowl. Now add the almond meal, golden flaxseed meal, sea salt, dried oregano and dried basil.  Now add your egg and mix. I used my hands, but you can use whatever you feel comfortable with.

    7. Once mixed together, use your hands to form the dough into a crust on your oiled parchment paper. Pat it down well because you want it nice and tightly formed together. Don't make it too thick or thin either.

    8. Carefully slide the parchment paper onto your hot pizza stone or baking sheet in the oven. Bake for 10 - 12 minutes, until it starts to turn golden brown. Remove from oven.
    9. Add however much sauce, cheese, and toppings you want. I added fresh mozzarella, sliced heirloom tomatoes, and fresh basil. 
    10. Put the pizza back in the hot oven and cook for another 5 to 7 minutes until the cheese is melted,and bubbly.


      I hope you enjoy this recipe as much as I did!

      -Deniz
      The Chef in the City


    Monday, September 8, 2014

    Chipotle Barbecue Shiitake Mushroom Fajitas


    Shiitake Mushrooms are amazing…especially for vegetarians.  They have a meaty texture and can take on that umami (meat-like) flavor with the right seasonings.  One of my favorite shiitake recipes is Shiitake "Bacon"….I have my own recipe that I will include below in case you are interested!
    Anyways back to the Fajitas….my husband loves anything with barbecue sauce, so I figured that cooking the mushrooms in a chipotle barbecue sauce would be delicious.  Add in some sautéed onions and cubanelle peppers and you have a quick and easy meal with lots of flavor.


    Chipotle Barbecue Shiitake Mushroom Fajitas

    My favorite chipotle barbecue sauce
    when I don't have time to make my own.
    • 4 tablespoons extra virgin olive oil, divided
    • 1 large onion, saute sliced (along the grain of the onion)
    • 2 cubanelle peppers, sliced into 1/4 inch thick pieces
    • 1/2 teaspoon sea salt
    • 12 oz shiitake mushrooms, stemmed and sliced into 1/2 inch thick pieces
    • 2 teaspoons tamari (or soy sauce)
    • 1/3 cup of your favorite chipotle barbecue sauce (I use Deer Camp Black Bear Chipotle when I don't have time to make my own)
    • Whole wheat tortillas
    • 1 avocado, sliced into bite sized pieces
    • 1/2 cup baby kale, or any green of your choice

    ** I have included photos below the procedure with additional comments**

    1. Preheat oven to 350 degrees Fahrenheit (only do this if you want to heat up your tortillas in the oven.)
    2. Heat a large skillet over a medium high flame.  Add 2 tablespoons of olive oil, and when it is glistening sauté the onions until they are golden, about 5 minutes. Try to resist the urge to mix the onions.  If you let them sit in the skillet, they will get a beautiful golden color.
    3. Add the peppers and 1/2 teaspoon of salt.  Sauté for 3-5 more minutes until the peppers are slightly tender.
    4. While you are sautéing the onions and peppers, you can begin to cook the shiitake mushrooms.
    5. In another large skillet, heat 2 tablespoons of olive oil over a medium-high flame.  Add the mushrooms and let sit for about 30 seconds before moving around.  Mix them every minute or so until they begin to glisten.
    6. Add the tamari and use the liquid to help scrape the browned bits of mushroom from bottom of the pan.  The browned bits are called the fond
    7. Once the tamari is absorbed, add the chipotle barbecue sauce and cook until the sauce is nicely coating the mushrooms.   I like my mushrooms a little crispy so I cooked them a little longer after all the liquid was absorbed.
    8. Warm your fajitas up in the oven.
    9. Cut up the avocado, and squeeze some lemon or lime nice on top.  Sprinkle with some salt.
    10. Assemble your fajitas!  I layered baby kale, sautéed onions and peppers, mushrooms, avocado.  I also added some hot sauce!  You could even smash the avocado and spread it on the bottom of the tortillas.  The ptions are limitless :)


      A saute slice is made by slicing the onion along the grain

      Saute Slices


      This is what the mushrooms
       look like when they are glistening


      Shiitake "Bacon" - I promised I would include this!

      • 1/2 pound shiitake mushrooms, stemmed and thinly sliced
      • 2 tablespoons olive oil
      • 1 tablespoon tamari (or soy sauce)
      • pinch of salt


      1. Preheat oven to 300 degrees Fahrenheit
      2. In a large bowl, gently massage mushrooms with olive oil, tamari and salt.
      3. Spread the mushrooms evenly on a parchment lined sheet tray and place in the oven.
      4. Check them after 20 minutes for doneness.  They should be slightly crispy.
      You can use shiitake bacon to make sandwiches, to put in salads ,or just snack on cuz they're that good!

      Enjoy!

      -Deniz
      The Chef in the CIty